Overview
This article covers best practices for setting up consistent branding across your hub.
We recommend that you establish most of these settings when setting up your cluster; after initial setup, you likely won’t need to change these settings, though of course you can if desired.
Note that all the settings in this article apply only to your specific hub; updates you make here will only be reflected on the hub on which you made them. For cluster-wide branding, check out the Cluster Branding help article. Understand the difference between Hub and Site-Wide Admin Tools here
Main Site Branding
Lost? Hub Admin → Initial Setup → Branding Settings → Main Site Branding
In Main Site Branding (under Branding Settings), you’ll be able to create the hub title (which will appear in users’ browsers, among other places) and basic color settings within the site.
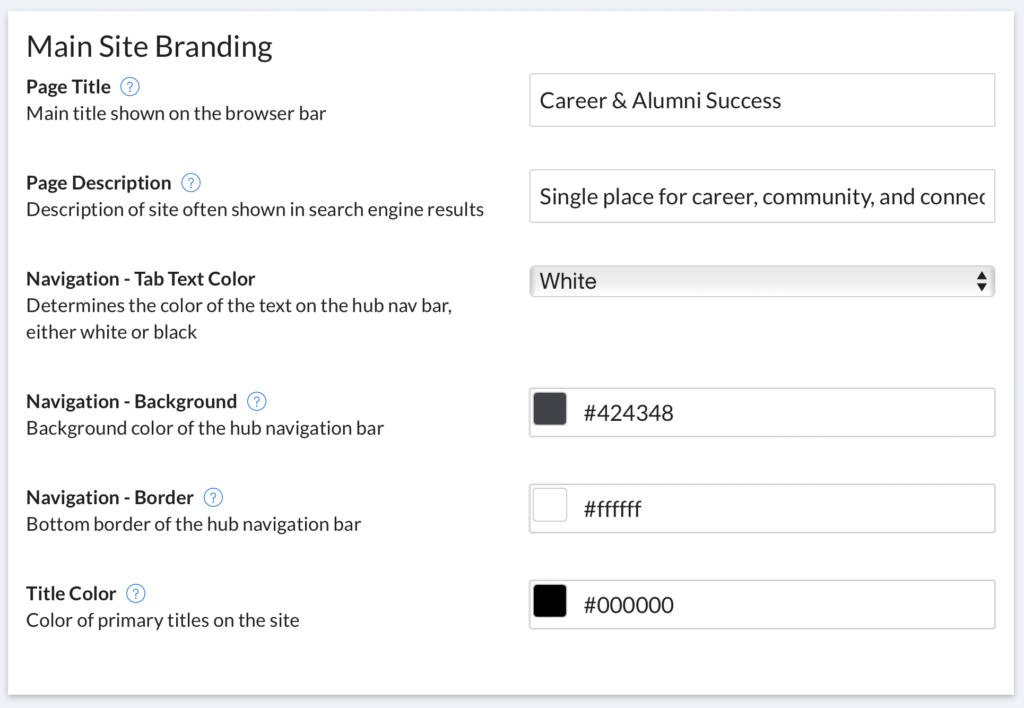
Page Title: The page title appears in the browser bar as pictured below.

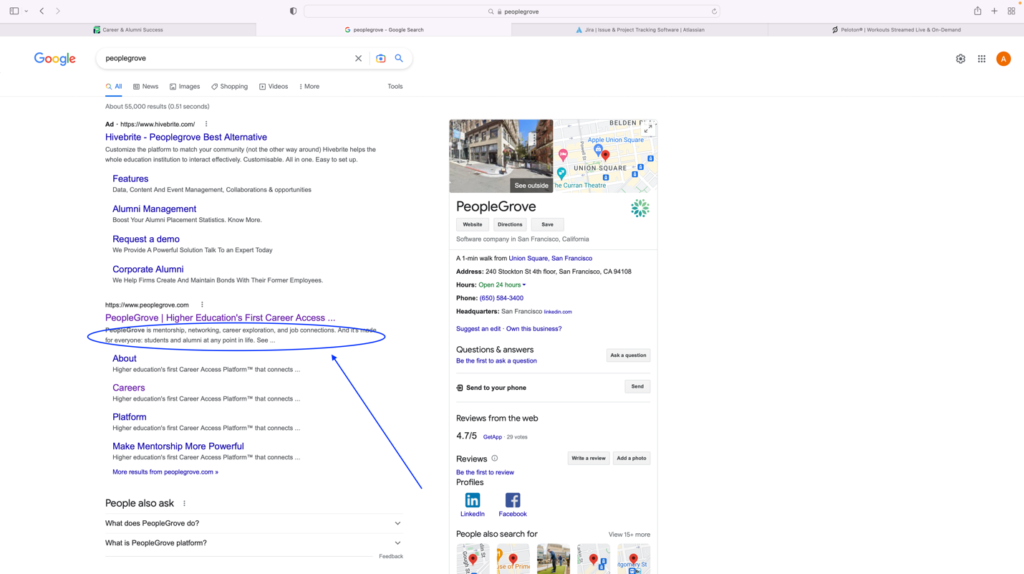
Page Description: The page description, also known as a ‘meta description,’ appears in search engine results.
Navigation – Tab Text Color: Determines the color of the text on the hub navigation bar.

Navigation – Background: The navigation background color is the color of the bar behind the main site navigation at the top of each page.

Navigation – Border: The navigation bottom border color is the color of the border at the bottom edge of the main site navigation at the top of each page. This appears as a very thin line that can help emphasize the bottom of the nav bar; you don’t necessarily need to enter anything here, so feel free to leave it blank.

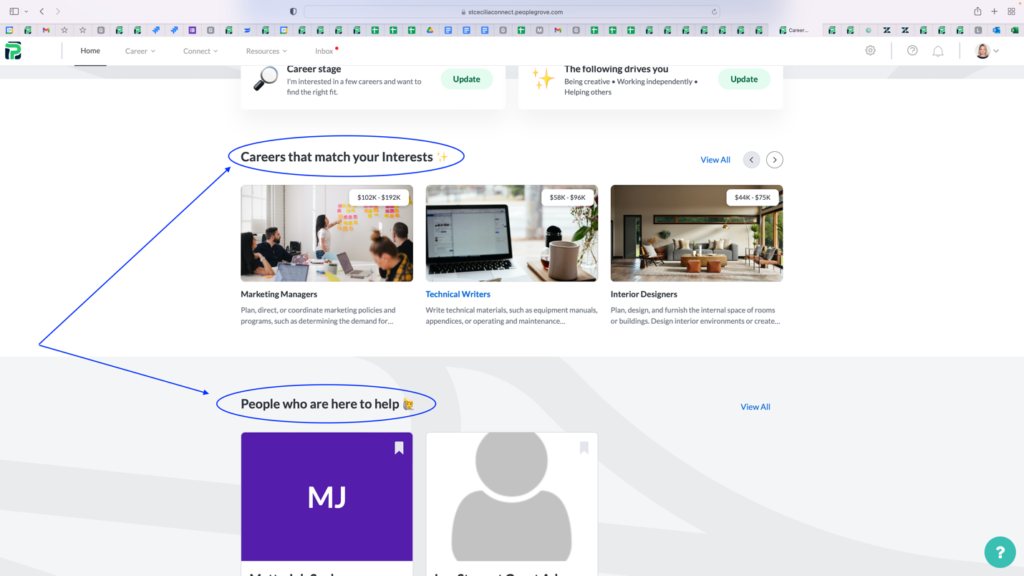
Title Color: The title color appears throughout the site as the color of important headings, for example those circled below.
Favicon
Lost? Hub Admin → Advanced Settings → Enable Module Settings → Cluster Settings → Branding
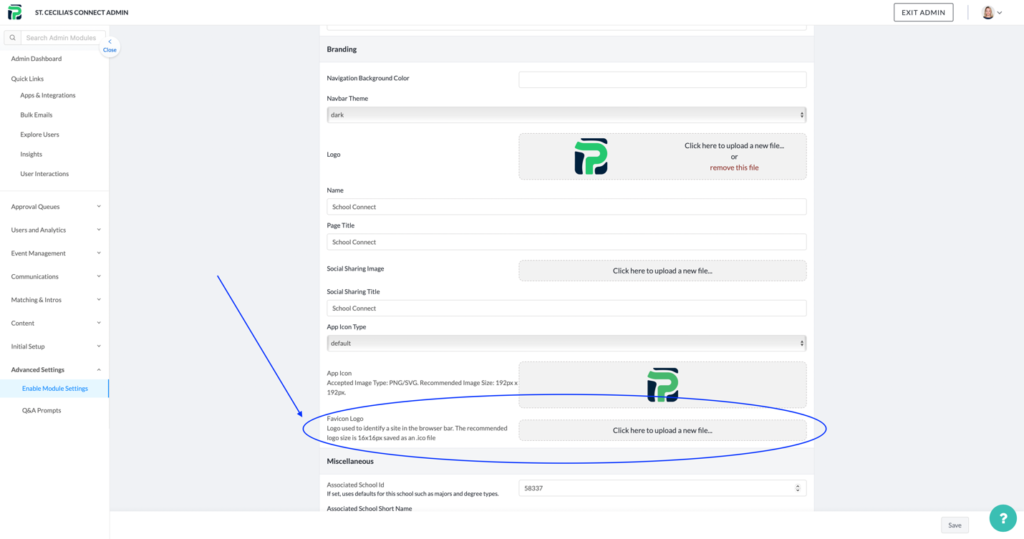
A favicon is a small image that serves as a visual reminder of your website identity in a visitor’s address bar or tabs.

To set up your favicon, go to Enable Module Settings under Advanced Settings. From the Cluster Settings tab, find Favicon Logo under Branding. Simply upload your image! We recommend making your logo 16x16px.
Email Settings
Lost? Hub Admin → Initial Setup → Branding Settings → Email Settings
Lost? Hub Admin → Initial Setup → Branding Settings → Email Settings
The “from” name and email address you enter here will be automatically inserted into the email template.
For example: As you draft a new bulk message in the platform, these will be the default name and email attached to that draft. You can manually change the “from” name and email on messages.
This is the email address that recipients will be able to respond to.
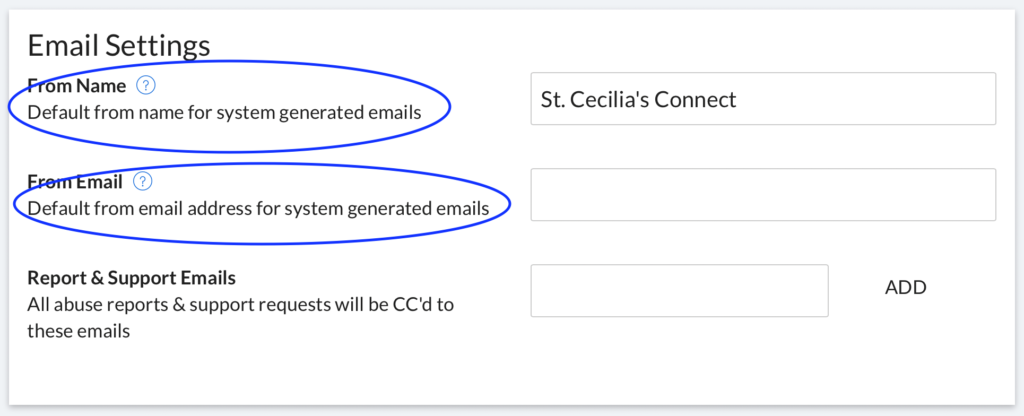
Recommendations for setting up your “From Name” and “From Email”
Use trusted address: Use an email that end users will recognize as associated with your organization. This helps end users understand it is not spam.
Set up a support email address: We recommend setting up a support email address for your platform rather than using a personal email. This will make it easier for users to remember and will make it easier on your end to share responsibility for responding to support requests or pass that task on to a colleague should your role change.
Don’t misspell your email: Double check that your email is entered correctly – we won’t be able to autocorrect if you make a typo.
Adding a Report and Support Email
Lost? Hub Admin → Initial Setup → Branding Settings → Email Settings
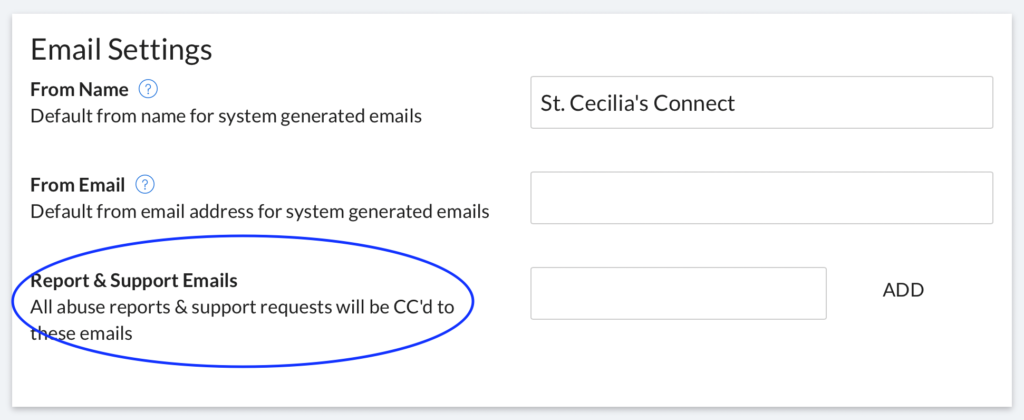
During configuration, you will include your own support address here. This will allow you to stay up to date on what end users are asking about and provide your community with support around platform-specific questions that only you can answer. There will be cases where an end user request will require PeopleGrove’s input. Please submit those requests to our support team for assistance.
In choosing your email, we recommend one to which you’re comfortable sending support tickets from end users. Typically, admins will use an email specific for the purpose, such as platformnamesupport@school.edu; however, some admins choose to use personal emails for this.
To add your email, simply paste it into the From Email and Report & Support Emails boxes, then scroll down and click Save.
Email Template Settings
Lost? Hub Admin → Initial Setup → Branding Settings → Email Template Settings
Whenever you start a new bulk email on the platform, you will start with your default email template. You will be able to manually modify the template on an individual basis for each new email you create, but in general we recommend setting up the template here to save time in the future.
This template will also be used when auto-notifications (both default and custom) are sent through the site. You will be able to modify the template on an individual basis for each custom notification, but not for the defaults.
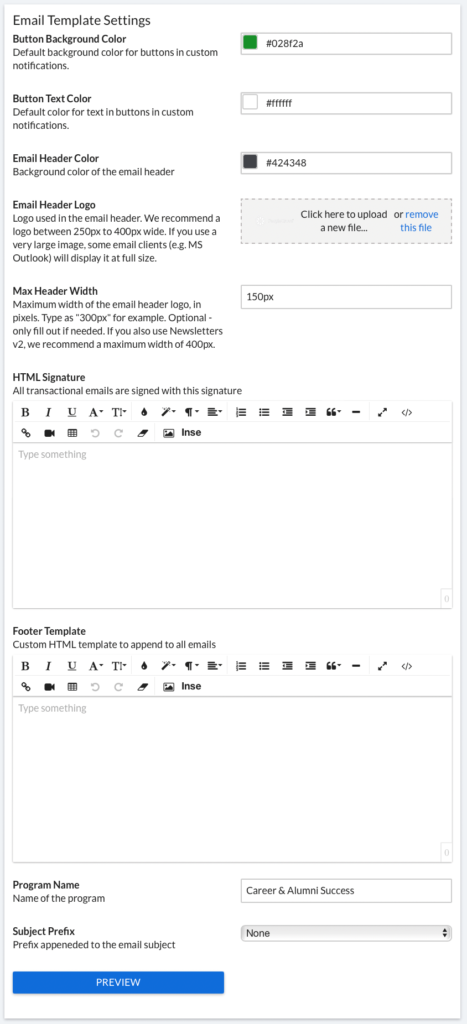
Most of the settings in this section are self-explanatory, but we’re briefly going over those that warrant additional info below. If you have further questions about setting up any of this, contact your account manager!
Tip: As you’re setting up your template, we strongly recommend periodically saving your changes and opening a new email template in the Bulk Email tool; this will allow you to see what your changes actually look like.
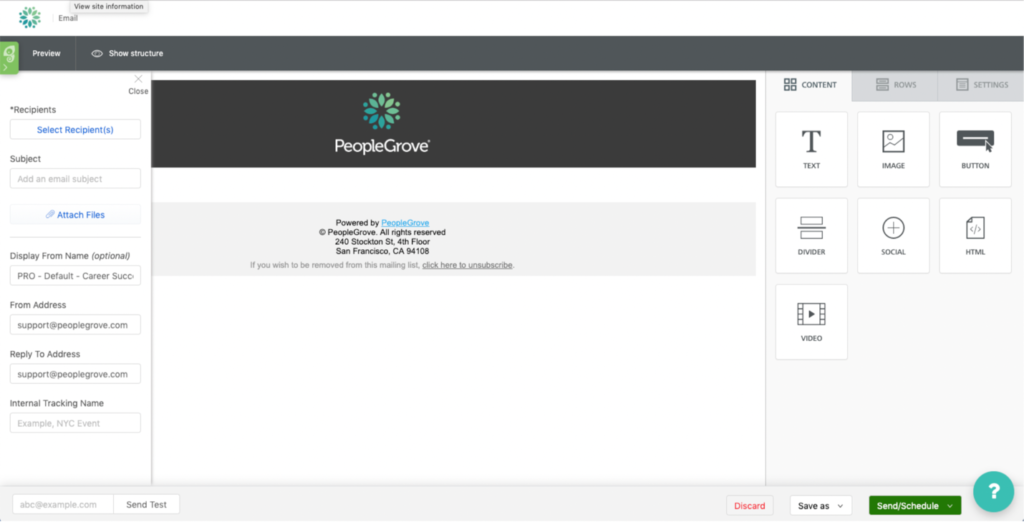
The Email Header
The Email Header Logo, Email Header Color, and Max Header Width settings all refer to the email header that will appear stretched across the top of the email template. Make sure to check your changes in the Bulk Email tool itself!

Email Header Best Practices
Transparent Logo Background: Use an email header logo with a transparent background for best results.
White logo against dark background: Using a white logo against a darker background is the best combo for making your logo stand out and be easily recognizable.Logo size of 350 pixels: We recommend a logo of 350 or fewer pixels; anything larger will make the header too big and could mess up formatting for some email clients.
HTML Signature
Add an email signature to personalize your emails or provide recipients with information about the platform or program.
The Footer Template
Business compliance guidelines require PeopleGrove to have a mailing address and an opt-out option for emails, so if you do adjust the emails, we require that you include both a mailing address and an opt-out option.
In addition to a mailing address and opt-out info, a typical footer might include copyright info or social sharing links.

Program Name
Typically, you can use your hub name as the “program name,” but feel free to use something else if desired.
Subject Prefix
The subject prefix, which is optional, would immediately precede the subject of the email. The advantage of using this is that will make all your emails consistent and recognizably from you, helping you build your brand. The disadvantage is that, because it takes up space, your actual subject will be pushed back and may not even show up.
